In this lesson you will learn how to pass an array to a VBA function. You can’t pass an array to any type of function. Function should be developed in such a way that it can accept arrays as variables. Syntax is similar to functions which accept other types of variables. But array arguments should have parenthesis at the end of the name. Here is the syntax of a VBA function which accepts an array as an argument. Data type of the argument is string. So you can only pass an array of a type string to this function.
Function FunctionName(ArrayParameterName() As String)
'-----------------------
'Codes of the function
'-----------------------
FunctionName = ResultString
End Function
Above example shows the syntax of a VBA function which has one argument. It accepts only arrays as the argument. Now let’s look at how to create a function using that syntax. Let’s develop a VBA function to calculate the average marks of students. It will accept an array of type double as the argument. This is how we can do it.
Function AverageMarks(Marks() As Integer) As Double
Dim TotalMarks As Integer
Dim StudentCount As Integer
Dim i As Integer
For i = LBound(Marks) To UBound(Marks)
TotalMarks = TotalMarks + Marks(i)
StudentCount = StudentCount + 1
Next i
AverageMarks = TotalMarks / StudentCount
End Function
Function iterates through elements of the “Marks” array while calculating the total marks and the student count. Finally calculate the average marks by dividing total marks by the student count.
We can call this within a subroutine as follows.
Sub FindAverageMarksOfClass()
Dim StudentMarks(9) As Integer
Dim ClassAvg As Double
StudentMarks(0) = 52
StudentMarks(1) = 92
StudentMarks(2) = 85
StudentMarks(3) = 45
StudentMarks(4) = 65
StudentMarks(5) = 32
StudentMarks(6) = 28
StudentMarks(7) = 62
StudentMarks(8) = 70
StudentMarks(9) = 68
ClassAvg = AverageMarks(StudentMarks())
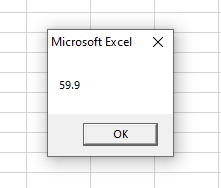
MsgBox ClassAvg
End Sub
This is the result of the subroutine.
Note that we have parentheses for the argument of the function.
Function AverageMarks(Marks() As Integer) As Double
However we can omit the parentheses when calling the function. So both the below methods will work.
ClassAvg = AverageMarks(StudentMarks())
ClassAvg = AverageMarks(StudentMarks)
What will happen if we pass non-array to a function which accepts array as the argument. Let’s check this by passing a non-array to the above function. Note that our VBA function has an argument of data type “Integer”. So we are going to pass a value of the same data type.
Sub FindAverageMarksOfOneStudent()
Dim Student1_Marks As Integer
Dim ClassAvg As Double
Student1_Marks = 85
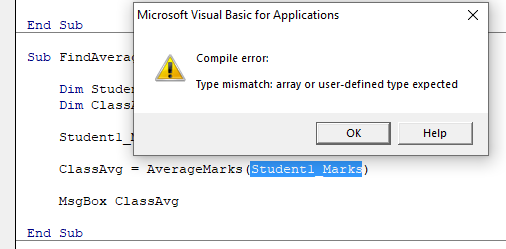
ClassAvg = AverageMarks(Student1_Marks)
MsgBox ClassAvg
End Sub
Above subroutine has a variable called “Student1_Marks”. It is a non-array variable of type integer. We assigned the marks of one student to that variable. Then called the function “AverageMarks” using the “Student1_Marks” as the parameter. Here is the outcome.
So you will get a compile error if you pass a non-array to a function which accepts an array as the argument.
Also you can pass an array to function only as ByRef (by reference). Some functions may analyze the array and return a result without doing any change to the array. But some VBA functions make changes to the array as well. So if the called function does any changes to the array, changes affect the original array. I will explain this using an example.
Assume we want a function which returns the third power of given numbers.
Function ThirdPower(Arr() As Long) As Long()
Dim i As Integer
For i = LBound(Arr) To UBound(Arr)
Arr(i) = Arr(i) ^ 3
Next i
ThirdPower = Arr
End Function
We can pass numbers as an array. Then the function will return the third power of those numbers. Here is how we can call this function from a subroutine.
Sub TestMacro1()
Dim MyArr(1 To 5) As Long
Dim ResultArr() As Long
MyArr(1) = 2
MyArr(2) = 3
MyArr(3) = 7
MyArr(4) = 8
MyArr(5) = 10
ResultArr = ThirdPower(MyArr())
End Sub
Now let’s set a breakpoint at “End Sub” and run the code.
If you view the arrays in the locals window, you will notice that the “MyArr” is also updated with the third power values. This is because the array is passed to the function by reference. You might think that you can pass the array by value using the ByVal statement. But it is impossible. You will get a syntax error if you try to pass the array by value.
Also read
How to Return an Array From VBA Function
Fixed Size Arrays in VBA
Multidimensional Arrays in VBA
Dynamic arrays in VBA
Quickly Write Multidimensional Array to Excel Range